Last Updated on June 9, 2026 by David
How to Effectively Clean and Reseal a Small Slate Floor Before It Deteriorates
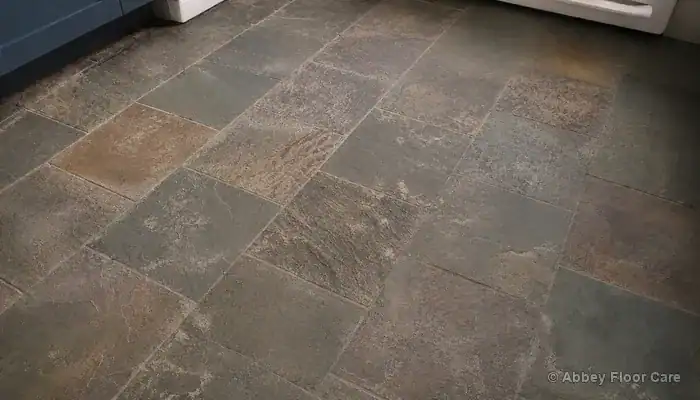
Cleaning a small slate floor is a feasible DIY task as long as the area remains manageable, the old coating is thin enough to soften, and the surface can be treated without flooding. The signs of trouble are often subtle. The floor may cease to respond to regular mopping, the colour appears flat, and dirty water tends to linger in the texture rather than being easily lifted away.
Identifying the Visible Issues
Slate cleaning becomes essential when standard washing begins to spread soil instead of eradicating it. A riven floor features small ridges, hollows, and tile edges that trap residues from old cleaners, worn sealers, and continuous damp mopping. After drying, the surface may exhibit a grey appearance, particularly in high-traffic areas such as kitchens, doorways, and sink runs, where dirty water has been repeatedly transferred into low points over the years.
Build-up from old sealer often manifests as inconsistent shine, sticky edges, dark lines around grout, or a dull film that seems to look better when wet but then dries flat again. This pattern indicates that the floor is more than just dusty. The cleaning water is struggling against a layered surface film, meaning stronger household detergents may leave further residue behind and complicate future cleaning efforts.
Detergent residues from routine mopping can create the illusion that a more aggressive cleaner is needed, yet the underlying problem is frequently accumulation. Each wash leaves a trace of surfactant, which attracts soil, causing the floor to re-soil more rapidly as the surface is no longer clean enough to accept a protective finish evenly.
Focusing on small areas makes slate cleaning more manageable, as you can observe how the surface reacts throughout the process. Tackling five square metres presents ample kneeling, scrubbing, wiping, and rinsing for most homeowners. While larger floors can still be cleaned by hand, it requires accepting that the task will be slow, repetitive, and tough on the knees, wrists, and shoulders.
Understanding the Correct Product Sequence
The original product sequence for small floor cleaning remains effective as it breaks down the process into clear stages: coating removal, deep cleaning, rinsing, and resealing. LTP Solvex effectively softens old acrylic sealers and wax, while LTP Grimex emulsifies the softened residue and embedded soil. An impregnating sealer protects the cleaned slate without leaving a surface film, and a surface sealer or wax adjusts the final sheen only after the floor is clean and dry.
The order of application is more critical than the specific brand used, as each stage serves a unique purpose. Begin by masking skirting boards, removing loose items, donning gloves and goggles, and then work on one or two square metres at a time. Apply the coating remover to the farthest reachable area, allow it to dwell, dampen it with the cleaning solution, agitate the surface, and remove the dirty slurry before it dries back into the low points.
The initial cleaning pass should not be considered the final outcome. Old acrylic, wax, and detergent layers may require several controlled passes before the tile and grout stop releasing grey or brown residue. Focusing on the same small section is safer than flooding the entire room, as it keeps the slurry visible, maintains control over dwell time, and reduces the likelihood of dragging dissolved contamination across already cleaned areas.
Effective wet slurry removal is a crucial aspect often underestimated in DIY attempts. A wet vacuum significantly eases the task by extracting dirty liquids from riven textures, grout lines, and tile edges before they settle again. While a mop, sponge, and cloth can work on very small areas, they require frequent rinsing, clean water changes, and a great deal of patience, as they can merely shift contamination rather than eliminate it.
Recognising When Normal Cleaning Is Insufficient
Slate cleaning has reached the appropriate stage for resealing when the surface no longer feels greasy, the rinse water remains reasonably clear, and the floor dries without smears or sticky patches. Although pale wear marks may still be present, as cleaning cannot restore surface colour lost to foot traffic, the goal is not to scrub away every variation. Instead, the aim is to eliminate residues to ensure the next finish can bond or penetrate evenly.
Drying time deserves more attention than most product labels imply. While slate may dry relatively swiftly, grout joints and riven troughs can retain moisture long after the surface appears dry. Allowing the floor to dry overnight, or for longer in the case of porous grout, mitigates the risk of sealing in moisture within the texture, which can lead to patchy absorption, clouding, or poor adhesion.
Testing the sealer should occur before treating the entire floor. A colour-enhancing impregnator can dramatically deepen the hues of Welsh, Indian, or black slate, which may be the desired finish. it can also render some mixed slate too dark in shaded corners or under kitchen units. Conducting a small test patch allows you to assess the appearance before committing to the complete floor treatment.
Once old coatings and residues have been thoroughly removed, routine care becomes more straightforward. A neutral stone cleaner, alongside a well-wrung mop and clean rinse water, will usually maintain a resealed floor far more effectively than harsh detergents. Broader cleaning routines are detailed in this guide to maintaining slate floors when they appear dull.
What Risks Arise from Rushed Slate Cleaning?
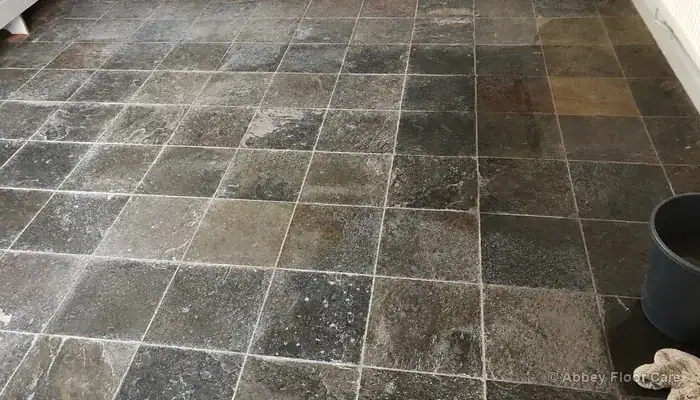
Rushed slate cleaning often leads to complications when critical factors such as cleaner strength, rinsing, drying time, or test patches are overlooked. Acidic products can alter the colour of softer slate, while harsh alkaline residues can interfere with the effectiveness of the next sealer if not adequately removed. The floor may appear cleaner when wet, but then dry with pale smears, sticky ridges, or darkened grout lines.
Thorough testing helps prevent cleaning errors from becoming lasting issues for your floor.
The build-up of residues worsens when dirty slurry dries back into the riven surface before extraction is complete. Excessive wetting also allows porous grout more time to absorb contaminated liquid, resulting in joints that appear darker than before cleaning commenced. Maintaining a controlled sequence ensures the cleaning process is powerful enough to remove old coatings while remaining careful enough to avoid transforming a minor maintenance task into a significant repair challenge.
Essential Tools for Controlled and Effective Slate Cleaning
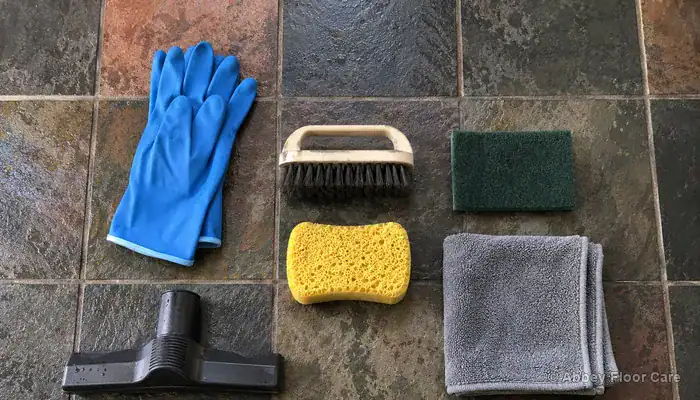
Utilising the appropriate tools makes slate cleaning predictable, as they enable controlled agitation, slurry removal, and rinsing without overwhelming the surface. Gloves, goggles, and knee pads protect you while working closely to the floor. Employing masking tape shields skirting boards and fixed furniture from splashes during the coating removal phase.
A brush or hand pad loosens softened sealer from the tile surfaces, while a grout brush effectively reaches the joints and tile edges where build-up typically accumulates. A wet vacuum is the most indispensable tool, as it removes dirty liquids before they settle into the ridges and troughs. A clean-water bucket, sponge, mop, and absorbent cloths facilitate repeated rinsing, ensuring the final surface is genuinely clean rather than merely diluted.
Determining When the Floor Is Ready for Safe Resealing
Before completing the cleaning process, the floor may still smear when wiped, the rinse water darkens quickly, and old coatings can cling around tile edges. Sealer should not be applied at this stage, as it will trap contaminants and exacerbate patchiness instead of providing protection for the slate.
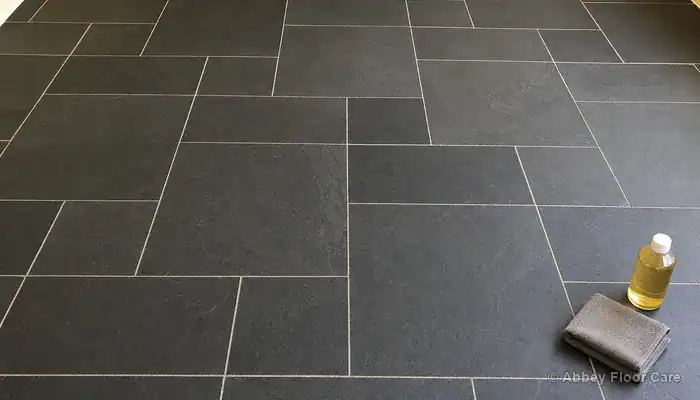
After cleaning is complete, the surface dries uniformly, the grout ceases to release dirty residue, and the slate readily accepts a test coat without exhibiting beading in some areas or excessive soaking in others. Establishing a practical aftercare routine is crucial: removing dry soil, conducting damp mopping with a neutral cleaner, using clean rinse water, and promptly wiping up spills will help maintain the resealed finish over time.
Where to Discover More About Maintaining Slate Floors
Additional guidance on slate care is best positioned after discussing the cleaning method, as this page primarily addresses a specific cleaning, stripping, and resealing task rather than every potential issue a slate floor can encounter. Topics such as flaking, filler collapse, sealer selection, wet-look finishes, and long-term maintenance all require broader context once the immediate cleaning work has been clarified.
Effective slate floor maintenance is most successful when the cleaning routine aligns with the type of stone, the surface finish, and the intended usage of the room. For instance, a kitchen floor adjacent to garden doors necessitates a different cleaning approach than a low-traffic hallway, even if both are made of slate. More comprehensive insights on behaviour, care, and long-term protection are available in this extensive guide on slate floors in UK homes.
Recommended Products Featured in This Guide
Slate Cleaning Chemicals
Slate Impregnating Sealers
Slate Surface Sealers
Slate Floor Wax
- LTP Clearwax — estimated £21.00 for 1 litre
Cleaning Materials
Personal Protective Equipment

David Allen — Abbey Floor Care
David Allen has dedicated over 30 years to cleaning and restoring slate floors for Abbey Floor Care, including small domestic areas where old sealers, dirty slurry, and detergent residues needed removal prior to resealing. His slate cleaning insights focus on controlled chemistry, careful extraction, and realistic DIY limits, enabling homeowners to protect their floors rather than inadvertently sealing in problems.
The article Clean Slate Floor Before Old Sealer Traps Dirt was first published on https://www.abbeyfloorcare.co.uk