Comprehensive Guide to Understanding Marble Etching
What Causes Etching on Marble Surfaces?
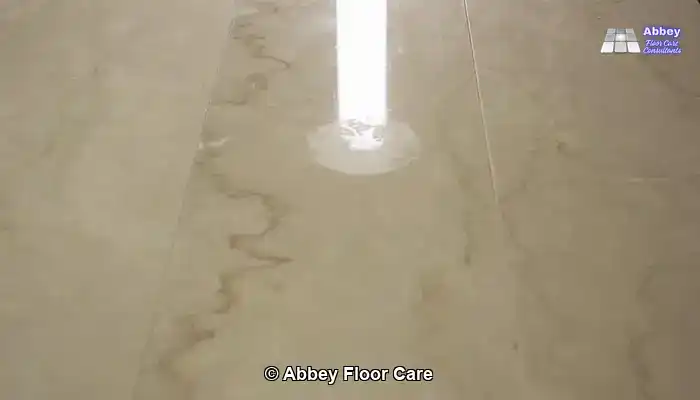
Marble Etch Removal Kits: Marble etching occurs when acidic substances interact with the calcium carbonate present in the stone. Common household items such as lemon juice, vinegar, wine, or even certain cleaning products can instigate this chemical reaction. The acid dissolves a microscopic layer of the marble's surface, leaving dull patches that disrupt its natural sheen. It’s important to note that even if your marble is sealed, these sealers primarily protect against stains rather than chemical reactions. Consequently, etching can still manifest and compromise the beauty of your marble.
Pro Tip: Recommended Products for Daily Maintenance of Travertine

Fila Pro Floor Cleaner
|
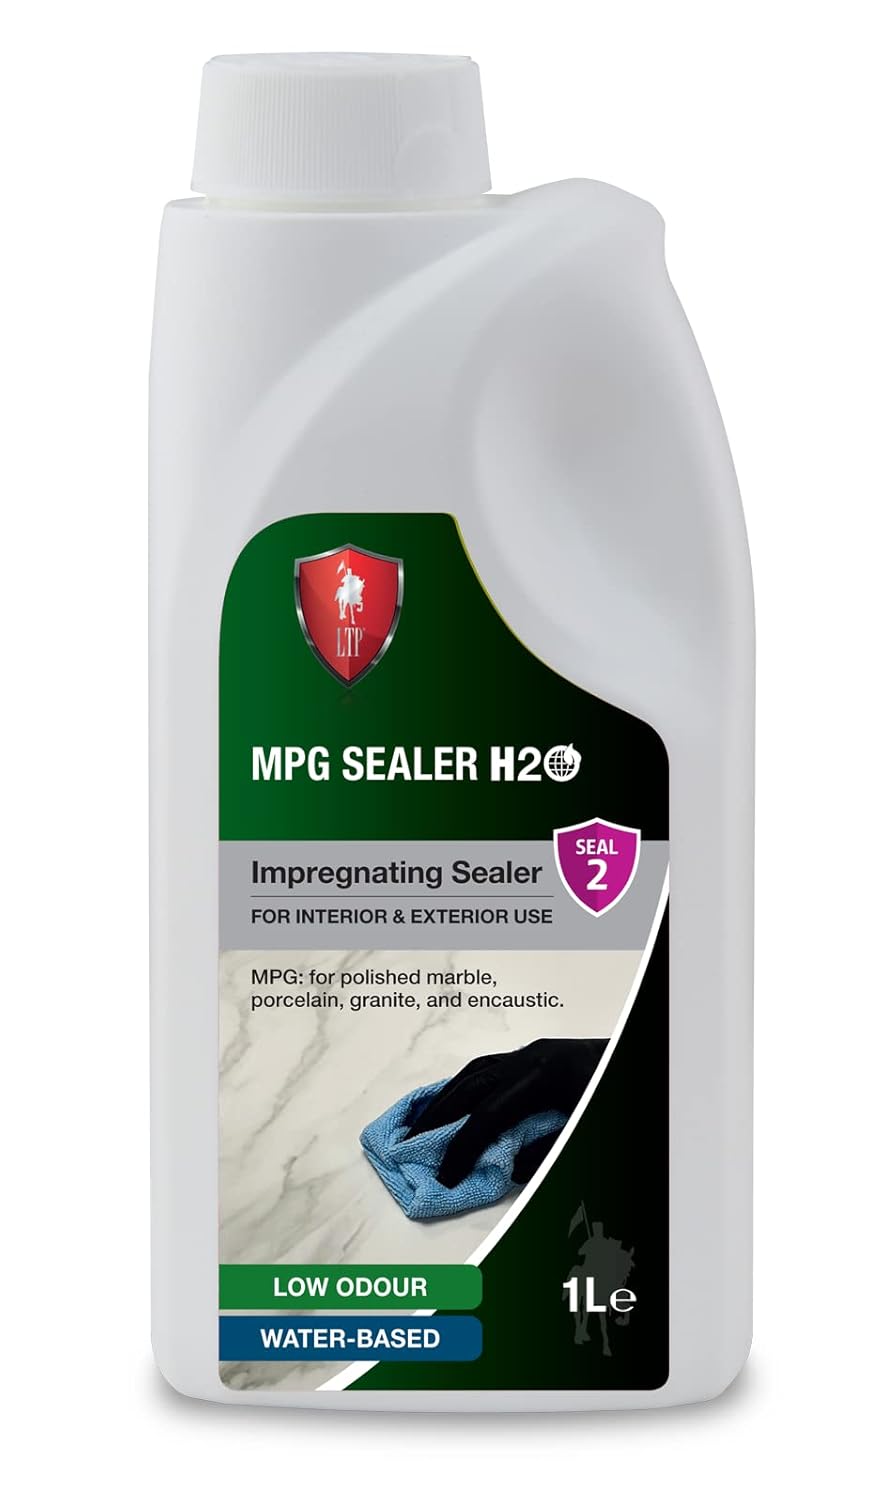
LTP MPG Sealer H20
|

Vileda H2PrO Spin Mop System
|
Etching vs Staining: Understanding the Key Differences
It’s common for individuals to confuse etching with staining, yet these two issues are quite distinct. Stains penetrate the stone and alter its colour, while etches modify the surface texture. You can usually determine the type by touch: if the affected area feels smoother or rougher compared to the surrounding stone, it indicates an etch. Stains typically present a noticeable colour variation, whereas etching manifests as a dull or cloudy appearance. Identifying the specific issue at hand is crucial for selecting the appropriate remedy.
Why Is Marble So Sensitive to Everyday Acids?
Marble, while undeniably beautiful, is softer than harder stones like granite or quartzite. Its significant calcium content reacts almost immediately with acidic liquids, even weak ones. A multitude of household cleaners marketed as “multi-surface” or “bathroom safe” can inflict visible harm in mere seconds. The moment acid comes into contact with the marble, it begins to erode the polished surface. Recognising this sensitivity is essential for effectively maintaining your stone and preventing unnecessary damage.
Exploring the Contents of a Marble Etch Removal Kit
Common Ingredients and Their Functionality
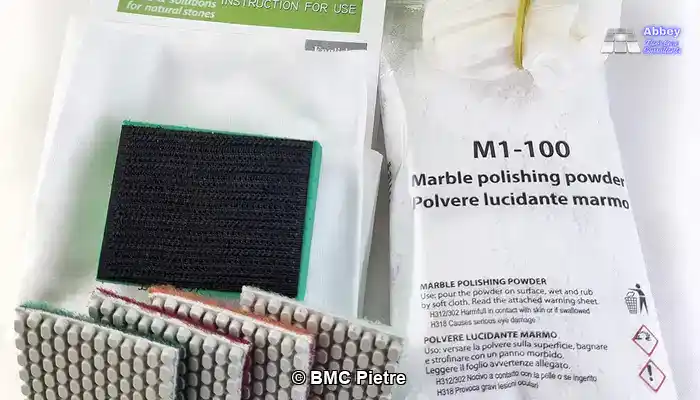
Typically, marble etch removal kits comprise diamond-impregnated polishing pads and a polishing powder that blends mild abrasives, polishing powders, and chemical buffers, along with pads specifically designed for the polishing powder. These components aim to smooth out the top layer of the stone’s surface and reinstate some of its original shine. The concept is simple: by gently rubbing the affected area, you polish away a fine layer of the dulled surface, enabling light to reflect evenly once more. However, the success of this process heavily relies on the depth of the etch and the specific type of marble involved.
The Science of Polishing Powders and Pastes Explained
Polishing powders and pastes utilise ultra-fine abrasive particles to smooth out the micro-scratches caused by acid damage. When applied under pressure and with moisture, the compound slightly remelts or burns the marble's surface, enhancing clarity. This technique can brighten light etching; however, it does not genuinely rebuild the stone. Essentially, you refine the surface rather than fix the material that has been dissolved by acid.
How Do DIY Kits Claim to Effectively Remove Etch Marks?
DIY kits usually promote quick results with a straightforward “rub-in” polishing method. The process generally involves applying a modest amount of compound to the dull area, working it in with a cloth or buffer pad, and subsequently wiping away any residue. While this can diminish the visibility of a faint etch, the enhancement is often short-lived. Most kits are formulated for minor, shallow marks and are ineffective at rectifying deep or widespread etching that alters the stone’s surface texture. The effectiveness of these kits also varies with the marble's density and finish; honed marble responds differently to polishing than highly polished stone.
Identifying When DIY Kits Are Effective — and When They Are Not
When Are Shallow Etches Suitable for DIY Kit Use?
Marble etch removal kits are intended to address shallow etching marks that are barely visible under natural light and have not compromised the stone’s texture. If the dull spot disappears when the surface is wet, this is a positive indication that it is minor enough for a polishing compound to effect change. In such instances, gentle buffing with the powder can restore some shine, although the finish may not perfectly match the surrounding area.
Understanding Deep Etches and Surface Deformation
Deep etching presents a more complex challenge. When acid damage penetrates the stone, it creates microscopic pits that cannot be remedied with powders or creams. This results in an uneven surface that scatters light instead of reflecting it beautifully. DIY products lack the abrasives or machinery necessary to level out this damage, so after numerous attempts, dull patches may persist. Over-polishing in one area can also make the surface patchy, drawing more attention to the flaw.
Why DIY Etch Removal Kits Fail to Fix Deep Damage
The polishing powders and diamond pads included in DIY etch-removal kits are designed for light surface polishing—not for eradicating deeper etches. While these kits may enhance the appearance of shallow marks, they do not possess the mechanical force required to cut through the chemically damaged layer of the stone. To effectively restore etched marble, you require aggressive diamond tooling utilised with electric hand machines. This process, known as diamond honing, physically grinds away the affected surface using progressively finer grits. It is the only dependable method for eliminating deep, dull patches and reinstating a clear, uniform reflection.
Without this mechanical action, powders and pads merely buff the surface. They fail to reach the etch depth, leaving the damage visible once the stone dries.
Evaluating the Effectiveness of a DIY Kit
Testing a Kit on a Small Area to Gauge Effectiveness
If you are keen to try a marble etch removal kit, it is advisable to test it on a small, inconspicuous area first. This approach provides a realistic expectation of the type of improvement you might achieve. Apply the compound following the provided instructions, and observe the area under natural light. If the dull mark shows only minor improvement, this result is likely the best you can expect across the remainder of the floor or worktop. Always refrain from aggressive rubbing, as this can lead to swirl marks and create an uneven finish.
How to Recognise When a DIY Kit Is Ineffective
One of the most common errors homeowners make is repeating the process too many times, hoping for superior results each time. If the etched area still appears cloudy after one or two attempts, the damage has likely extended beyond the kit’s capabilities. Continuing to rub the surface can erode the stone’s protective polish, resulting in a larger dull patch. At this juncture, you are simply redistributing the damage rather than genuinely repairing it.
Preventing Additional Damage During DIY Attempts
Before using any product, please read the label thoroughly and verify that it is appropriate for your marble finish. Steer clear of acidic cleaners, abrasive pads, or mechanical buffers not intended for stone. Always rinse the surface thoroughly afterwards to eliminate any residue that might later react with the marble. By taking these simple precautions, you can prevent new etches from forming and safeguard your marble until you can arrange for a professional inspection if necessary.
Effective Professional Restoration Techniques
The Process of Diamond Honing and Polishing Explained
Professional stone restoration hinges on diamond honing to remove the upper layer of damaged marble, unveiling a fresh surface beneath. Utilising specialised machinery and a series of diamond grits, each pass refines the surface until it regains its natural reflection. This method is entirely mechanical, rather than chemical, meaning it rectifies physical damage rather than merely covering it. Once honed, the marble can be polished to the desired level of gloss and subsequently sealed for ongoing protection.
How Professional Techniques Differ from DIY Approaches
In contrast to DIY kits, professional honing completely removes the etched material rather than attempting to disguise it. The machines employed are specifically designed to maintain a perfectly flat surface across extensive areas, something that is unachievable by hand. Technicians also navigate through multiple grit levels to achieve the original sheen, accommodating finishes from matte to high polish. The outcome is a uniform, reflective surface that restores the stone's aesthetic appeal and smooth texture.
Why Professional Restoration Yields Longer-Lasting Results
Once marble has been properly honed and sealed, it becomes significantly easier to maintain. Professional sealing products penetrate deeply into the stone, diminishing the rate at which liquids and dirt can be absorbed. Although sealing cannot prevent etching, it simplifies future cleaning and helps preserve the even gloss achieved during restoration. With the right care routine, the results can endure for years before any additional intervention is necessary.
Strategies for Preventing Future Etching
Selecting Appropriate Cleaning Products for Marble
The most effective defence against marble etching begins with your everyday cleaning practices. Always opt for pH-neutral cleaners specifically formulated for natural stone. Avoid vinegar, lemon-based sprays, or limescale removers, as even minor splashes can cause fresh etches. A straightforward mix of warm water and a small amount of stone-safe cleaner suffices for regular maintenance.
Implementing Mats and Coasters in High-Risk Areas
Prevention is considerably easier than repair. In kitchens, place mats beneath chopping boards and areas where drinks are served to catch spills before they reach the surface. In bathrooms, keep bottles and cosmetics on trays instead of directly on the marble. Even toothpaste and mouthwash can etch polished stone if allowed to sit for prolonged periods. These simple habits can lead to significant improvements over time.
Maintaining a Gentle Cleaning Routine for Longevity
Marble responds best to gentle care. Mop or wipe surfaces weekly, then dry them immediately with a soft microfibre cloth to avoid streaks. For floors, utilise felt pads under furniture legs and refrain from dragging items across the surface. Consistency is key: regular light cleaning will preserve the stone’s natural sheen and reduce the likelihood of chemical damage.
Making Informed Decisions About Your Marble Care
Cost Analysis: DIY Kit vs Professional Restoration Services
In the UK, DIY etch-removal kits are available at prices ranging from approximately £20 to £60, depending on the brand and size. In contrast, professional marble honing and restoration services typically cost between £20 and £40 per square metre for moderate damage, escalating to £50 or more per square metre for extensively etched or larger areas.
While opting for the DIY route may initially save you some money, it often provides only a temporary solution for minor surface marks. Professional restoration, despite the higher upfront cost, offers a deeper, more enduring result that maintains your marble's appearance and durability, helping you avert costly repairs in the future.
How to Select a Reliable Local Marble Specialist in Surrey
When searching for a marble specialist in Surrey, begin by reviewing local feedback and requesting before-and-after images of their natural stone projects. Ensure they possess specific experience with marble and have a solid understanding of acid etching, rather than just general cleaning expertise. Ask whether they utilise dust-free, water-based honing systems to minimise mess and safeguard your home’s interiors.
It is also important to assess whether the provider offers transparency regarding their process, the elements of the work included, how they manage furniture and flooring protection, and if they provide warranties or maintenance advice afterwards. A reputable specialist will clearly communicate what level of restoration is feasible and realistic.
When It Is Justifiable to Invest in Professional Care
Suppose your marble floor exhibits significant dull patches, pits that catch light, or inconsistencies in reflection across a large area. In that case, the DIY approach may inadvertently exacerbate visible damage by creating uneven gloss or highlighting flaws. In such scenarios, the expertise and controlled techniques that a professional offers are well worth the investment.
Deep etching alters the stone’s surface structure, and only mechanical methods, such as diamond honing, can effectively restore balance and clarity. If you desire the best long-term results and your marble is a pivotal aesthetic feature in your home, opting for professional care is a wise decision.
Frequently Asked Questions About Marble Etch Removal and Restoration
What Is Marble Etching and How Does It Occur?
Marble etching occurs when acidic substances, including lemon juice, vinegar, or wine, react with the calcium carbonate in the stone. This reaction dissolves a thin surface layer, resulting in dull or cloudy marks that differ from typical stains. Unlike stains, etching alters the texture, not just the colour, which is why simple cleaners cannot resolve the issue.
Do Marble Etch Removal Kits Actually Deliver Results?
These kits can assist with very light, shallow etches where the damage has not penetrated deeply into the surface. Kits that contain polishing powders may restore some shine, but they do not correct deeper etching. For significantly visible dull spots or rough patches, only diamond honing can eliminate the damaged layer and restore a uniform finish.
How Can I Determine if an Etch Is Too Deep for a DIY Kit?
If the dull mark disappears when wet but reappears when dry, it is likely shallow enough for a DIY polish. However, if the mark feels rough, catches light at an angle, or remains dull after gentle buffing, it is too deep. At this stage, professional honing is the only dependable solution.
What Is the Cost of Professional Marble Restoration in the UK?
Professional marble honing generally costs between £20 and £50 per square metre, depending on the extent of the damage and the desired finish. Minor repair work may be less expensive, while large or heavily etched areas can incur higher costs. The price reflects the specialist equipment and skills required to achieve a seamless and lasting result.
Can Sealing Marble Prevent Etching?
Sealing protects against staining but does not prevent etching. Acidic substances can still react with the surface, even if it is sealed. However, sealants make cleaning easier and slow down absorption, making them an essential aspect of long-term maintenance.
Is There a Distinction Between Polishing and Honing Marble?
Indeed, there is a difference. Honing employs diamond abrasives to smooth the stone and eliminate damage, resulting in a matte or satin finish. Polishing goes a step further, refining the honed surface to achieve a high gloss. Both processes are interconnected: honing addresses the problem, while polishing restores the final shine.
What Measures Can I Take to Prevent Future Etching?
Utilise pH-neutral stone cleaners, promptly wipe up spills, and avoid acidic products near your marble. Implement mats, coasters, and trays in high-use areas, particularly kitchens and bathrooms. Consistent gentle cleaning and immediate attention to any marks will help keep your marble looking pristine for years.
The Article: Do Marble Etch Removal Kits Actually Work? (Before You Buy) first appeared on https://www.abbeyfloorcare.co.uk