Essential Insights from “Can I Restore a Travertine Floor Myself? A DIY Guide”
- DIY travertine restoration significantly enhances visual appeal by eliminating surface dirt, applying a fresh sealer, and achieving a glossy finish with a topical treatment—perfect for lightly soiled or dull surfaces.
- Understand the limitations of DIY methods: addressing deeply ingrained soil, etches, lippage, and resin crack repairs necessitates professional-grade equipment and expertise.
- Selecting appropriate products is crucial—pH-neutral cleaners are safe for regular upkeep, while alkaline cleaners such as LTP Grimex can effectively tackle tougher grime when used appropriately.
- Minor holes and cracks can be adequately filled with grout using a DIY travertine repair kit, but professionals should ideally handle resin-based repairs and colour-matched finishes.
- The article offers genuine, practical advice to empower UK homeowners to make informed choices, featuring a clear table illustrating what DIY efforts can and cannot accomplish.
How Can I Effectively Restore My Travertine Floor?
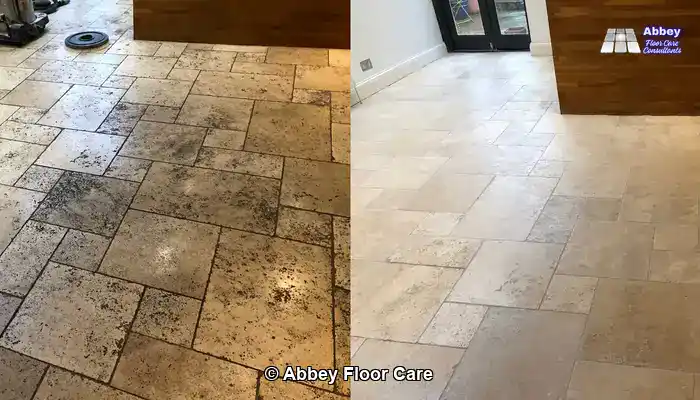
Restoring a Travertine Floor: Undertaking a DIY travertine restoration can lead to a substantial improvement in the appearance and tactile quality of your floors, particularly if they are dull, show light soiling, or have not been sealed for an extended period. By using the right products and dedicating some time, you can successfully eliminate surface dirt, apply a fresh layer of sealer, and even achieve a sheen or glossy finish with a topical sealer. This method is particularly suited for homeowners wishing to breathe new life into their floors without the expense of hiring a professional.
Nevertheless, it is crucial to recognise the limitations inherent in DIY methods. DIY approaches are generally ineffective at eliminating deeply embedded soil, etching marks, or the uneven wear caused by years of foot traffic or spills. These complications typically require diamond honing or pressurised rinse-and-capture equipment, tools beyond the reach of most homeowners.
If your travertine floor shows cracks, you might be able to fill them with grout as a cosmetic remedy. However, resin fillers, which provide a more permanent bond and seamlessly integrate with the stone, require specialised tools and a degree of craftsmanship to apply correctly. Thus, DIY restoration should be viewed as a deep clean and reseal rather than a complete restoration process.
Comparing DIY and Professional Travertine Restoration: A Practical Overview
| Task or Outcome | DIY Possible | Professional Recommended |
|---|---|---|
| Remove surface dirt, grime and light sealer residue | ✅ | |
| Apply an impregnating or topical sealer. | ✅ | |
| Add sheen or gloss with a topical sealer. | ✅ | |
| Fill small cracks with grout. | ✅ | |
| Remove deep ingrained soil. | ❌ | ✅ |
| Correct etching or dull patches | ❌ | ✅ |
| Polish with diamond pads | ❌ | ✅ |
| Fill cracks with resin fillers. | ❌ | ✅ |
| Flatten uneven tiles (lippage) | ❌ | ✅ |
| Remove heavy build-up of topical sealers. | ❌ | ✅ |
This comprehensive guide provides all the information you need to evaluate surface damage, select stone-safe products, and implement sealing and maintenance practices to prolong the life of your floor. Whether your travertine is honed, tumbled, or polished, you will acquire the knowledge needed to restore its natural beauty—safely, efficiently, and with confidence.
Exploring the Characteristics of Travertine as a Natural Stone
What Makes Travertine Stand Out Among Natural Stones?
Travertine is a unique sedimentary stone formed through the accumulation of mineral deposits, typically located around hot springs. Its surface is characterised by natural pits, subtle colour variations, and a soft texture that imparts a warm, organic aesthetic. These distinctive features make travertine tiles particularly suitable for UK homes seeking a rustic or timeless design.
Popular Finishes of Travertine in the UK: Honed, Tumbled, and Polished
Homeowners in the UK typically encounter travertine in one of three finishes. Honed travertine is smooth yet matte, making it ideal for high-traffic areas such as kitchens and hallways. Tumbled travertine offers a weathered, antique appearance with rounded edges, often favoured in country-style interiors. Polished travertine has a glossy surface and requires more maintenance to maintain its shine.
Why Does Travertine React to Acids and Moisture?
Due to its high calcium carbonate content, travertine reacts unfavourably to acidic substances such as vinegar, wine, or citrus, which can lead to etching and a dull appearance if spills are not promptly cleaned. Additionally, its porous nature allows for easy moisture absorption, making sealing an essential aspect of long-term care and maintenance.
What Does DIY Restoration Entail?
Restoring travertine on your own requires a systematic approach to cleaning, sealing, and maintenance. Begin by assessing the surface for signs of wear, selecting stone-safe products, and adhering to a meticulous process that respects the stone's natural properties. DIY restoration prioritises understanding how travertine responds to treatment and working harmoniously with its porous structure.
When Should I Seek Professional Assistance?
While many UK homeowners can manage basic cleaning and sealing tasks, more serious issues, such as significant etching or lippage, necessitate professional equipment or expertise. If your floor has uneven tiles, deep scratches, or old topical sealers that need to be removed, consulting a professional may be prudent. Nevertheless, most standard travertine care can be undertaken safely with appropriate guidance and tools.
Potential Dangers of Using Harsh Cleaners or Tools
Travertine is particularly sensitive to acids and abrasives. Using bleach, vinegar, or scrubbing pads can cause etching, dullness, and surface damage. Even certain “natural” cleaners marketed for tiles may be excessively harsh for calcium-based stones. Always ensure that your cleaning products are explicitly labelled as safe for travertine or natural stone, and conduct a patch test in a discreet area before full application.
Comprehensive Steps for Travertine Floor Restoration
Evaluating Surface Wear and Damage
Before commencing any restoration work, thoroughly inspect the floor under adequate lighting. Look for dull patches, fine scratches, and cloudy etch marks caused by acidic spills or heavy foot traffic. Identifying these signs will help determine whether your travertine needs a light clean, a thorough polish, or a complete resealing. Recognising the type and extent of wear is the initial step in devising a safe and effective DIY strategy.
Selecting the Right Cleaner for Travertine
Always opt for a pH-neutral cleaner for the regular maintenance of travertine floors. These gentle formulations are specifically designed for natural stone and will not interact adversely with the calcium carbonate present in travertine. However, if your floor exhibits heavier, ingrained dirt or greasy residues, you may need to utilise a specialist alkaline stone cleaner to dissolve the buildup effectively.
Alkaline cleaners are more robust, so it is critical to follow the manufacturer's instructions strictly. Apply the cleaner uniformly, allow it to sit for the recommended duration, and then rinse thoroughly with clean water to eliminate all residue. Avoid acidic or general-purpose household cleaners, as these can etch or damage the stone surface.
If in doubt, always test new products in a discreet corner first and monitor for any changes in texture or colour before treating the entire floor.
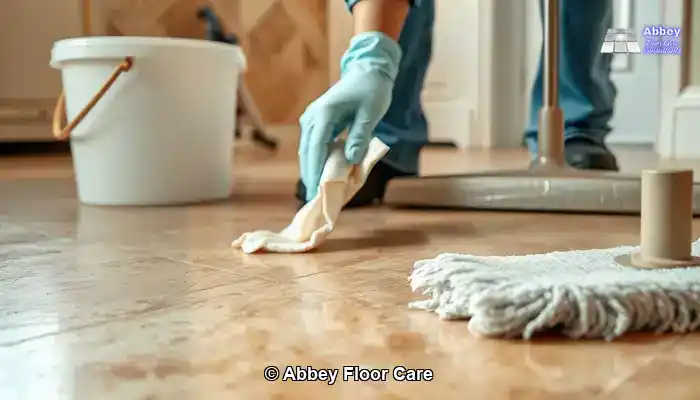
Employing Safe Agitation and Rinsing Techniques
Evenly distribute the cleaner and allow it to dwell for 5 to 10 minutes. Use a soft white pad or a microfibre mop to agitate the surface gently. Avoid aggressive scrubbing or abrasive tools. Rinse thoroughly with clean water and remove any excess moisture with a wet vacuum or a dry mop. This ensures that no residue remains before you proceed to seal the floor.
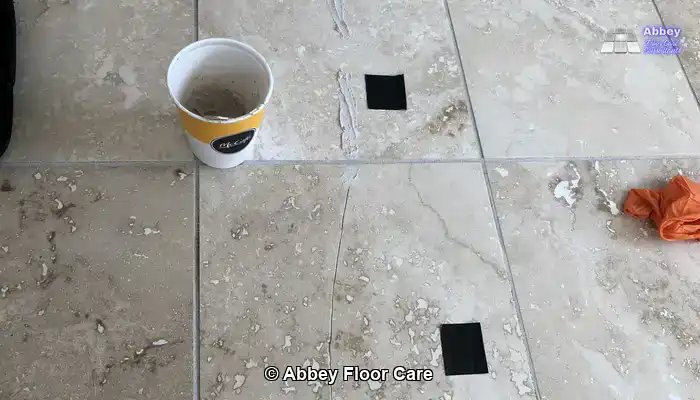
DIY Repairs: Filling Small Cracks and Holes in Travertine
If your travertine floor exhibits small open holes or surface cracks, you can perform basic repairs yourself using a cement-based grout. This type of filler is straightforward to apply and significantly enhances the appearance while preventing dirt from accumulating in the gaps.
For further details, refer to this post on Travertine Repair Kit for Filling Holes.
Best Practices for Optimal Results
- Thoroughly clean the area before applying grout. Remove any loose debris or dust.
- Work the grout firmly into the hole or crack, ensuring it fills the space.
- Wipe away excess with a damp cloth before it dries.
- Allow the grout to cure before cleaning or sealing the floor fully
This type of repair is suitable for cosmetic touch-ups. However, if cracks are deep or spreading, or if a seamless colour match is desired, it is advisable to consult a professional who can employ resin fillers and specialised tools for a more durable solution.
Drying and Preparing for Sealing
Allow the floor to dry completely—ideally for 12 to 24 hours, depending on ventilation conditions. The porous nature of travertine can trap moisture, hindering sealer absorption. Once dry, evaluate the surface for consistency and ensure that no cleaner residue remains. This phase is critical in establishing a solid foundation for effective sealing.
Applying a Stone-Safe Sealer
If you wish to maintain the natural look of your travertine floor, opt for a breathable impregnating sealer. This type of sealer penetrates the stone, protecting against stains without altering its appearance. Apply it using a lint-free cloth or applicator pad, working in small sections. Allow it to soak in, and then wipe away any excess before it dries. Avoid applying too much, as this may leave streaks or a tacky finish. Always adhere to the instructions on the label, including the recommended waiting period before walking on the floor.
If your floor appears dull and you prefer a slight sheen or gloss, consider using a film-forming topical sealer. This type rests on the surface, providing a polished effect, which can be beneficial if you lack the tools or experience required for professional polishing. Regardless of the type chosen, it remains vital to clean the floor with the manufacturer’s recommended cleaner to ensure the sealer functions effectively and does not damage the finish.
Conducting a Post-Sealing Inspection and Cure Duration
After sealing, perform a straightforward water-drop test to evaluate coverage. If water beads on the surface, the seal is functioning effectively. Allow the floor to cure undisturbed for the advised duration, typically 24 to 48 hours. This ensures the sealer adheres properly and safeguards the stone against future staining and wear.
Essential Tools and Products for DIY Travertine Maintenance
Choosing Suitable Cleaners and Stone-Safe Pads
For daily cleaning, it is advisable to use a pH-neutral cleaner designed for natural stone. These gentle formulations effectively remove everyday dirt and spills without reacting with the calcium in travertine, helping to protect the surface and preserve the sealer. Pair these with a soft white pad or microfibre mop to avoid scratching the stone. Avoid standard household tile cleaners, as many contain acids or harsh chemicals that can gradually damage travertine.
When a floor requires restoration, it is often dull, greasy, or covered in built-up grime—particularly in kitchens or high-traffic zones, necessitating a more intensive clean. In such scenarios, a specialist alkaline stone cleaner, such as LTP Grimex, can help break down persistent dirt. These products are more potent than standard cleaners, so it is crucial to follow the label instructions carefully. Allow the cleaner to work for the recommended duration, then rinse thoroughly with clean water to eliminate all residue.
Utilising the correct cleaner at the appropriate time significantly impacts overall results. Use pH-neutral products as your standard for regular maintenance, and reserve alkaline cleaners for deeper cleaning when your floor needs a refresh. Always test any new product in a small, hidden area to ensure it does not affect the colour or finish of your travertine.
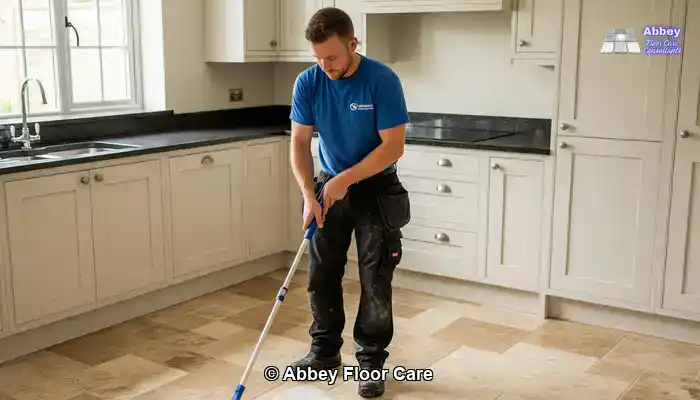
Employing Wet Vacuums and Microfibre Mops
Following cleaning, utilise a wet vacuum to extract the soiled solution and rinse water. This prevents residue from settling into the stone’s pores. For routine maintenance, a microfibre mop with clean water or a diluted stone-safe cleaner helps maintain freshness without excessive moisture.
Understanding Impregnating versus Topical Sealers
Impregnating sealers penetrate the stone, providing internal protection against stains while allowing moisture to escape. In contrast, topical sealers form a surface layer and create a satin or glossy finish.
Recommended UK Brands to Consider
Seek out reputable UK brands that specialise in stone care, such as Lithofin, Fila, and LTP. These companies provide stone-safe cleaners and sealers specifically formulated for travertine and other calcium-based stones. Always verify product labels for compatibility and meticulously adhere to usage instructions.
Maintenance Strategies Following Restoration
Implementing Weekly Cleaning Routines
After restoration, maintain your travertine floor's aesthetic with consistent, gentle cleaning. Utilise a microfibre mop along with a diluted pH-neutral stone cleaner once or twice weekly. Avoid over-saturating the surface and always rinse with clean water when using any cleaning product. This routine will help preserve the seal and prevent dirt from accumulating in the pores.
Identifying Early Signs of Wear
Monitor high-traffic areas for dull spots, fine scratches, or uneven sheen. These are early indicators that the surface may require attention. Spot cleaning with a stone-safe product and performing occasional resealing in these areas can avert the need for more extensive restoration work in the future. Travertine is responsive to proactive maintenance.
When Should I Reseal My Travertine Floors?
Most travertine floors benefit from resealing every 12 to 24 months, contingent on usage and exposure levels. Conduct a water-drop test—if water no longer beads on the surface, it is time to reseal. Always ensure thorough cleaning before applying a new sealer coat, and allow adequate curing time to ensure long-lasting protection.
Common Pitfalls to Avoid During Restoration
Avoiding Overwetting or Insufficient Rinsing
Travertine is highly absorbent, so excessive water during cleaning can cause moisture to infiltrate the stone, diminishing the seal's effectiveness and promoting staining. Conversely, failing to rinse sufficiently after applying a cleaner can leave residue that dulls the surface. Always use minimal water and promptly remove excess moisture with a wet vacuum or dry mop.
Steering Clear of Acidic or Abrasive Products
A prevalent mistake is using products not formulated for natural stone. Cleaners containing vinegar, lemon, bleach, or abrasive detergents can cause etching and surface deterioration. Similarly, abrasive pads or brushes can mar the finish. Stick to pH-neutral, stone-safe products and gentle tools to maintain the floor’s integrity.
Importance of Surface Preparation Before Sealing
Applying sealer to a dirty or damp floor can trap impurities, reducing its effectiveness. Always ensure the surface is clean, dry, and free from residue before sealing. Rushing this step may result in uneven results and could necessitate stripping and resealing sooner than anticipated.
Frequently Asked Questions About DIY Travertine Restoration
Can I Utilise Steam Cleaners?
Steam cleaners are not advisable for travertine floors. The high temperatures and moisture can penetrate the stone’s pores, jeopardising the seal. Instead, use pH-neutral cleaners and soft pads for safe, effective cleaning without risking damage.
What Should I Do If My Floor Is Already Damaged?
If your travertine exhibits deep etching, cracks, or uneven tiles, DIY methods may be insufficient. Basic cleaning and sealing can help stabilise the surface, but professional restoration may be necessary to address structural issues or severe wear.
How Long Will Restoration Last?
With appropriate care, a restored travertine floor can remain protected for 12 to 24 months before resealing becomes necessary. Regular maintenance and the use of stone-safe products will prolong the life of your restoration and retain the natural beauty of your floor.
Is DIY Travertine Care Environmentally Friendly?
Indeed, many UK brands offer eco-friendly stone care products that are biodegradable and safe for indoor use. By avoiding harsh chemicals and minimising waste, DIY travertine care can be both effective and environmentally responsible.
This article, Can I Restore a Travertine Floor Myself? A DIY Guide was first published on https://www.abbeyfloorcare.co.uk

Your insights on DIY travertine restoration really struck a chord with me. I’ve always been tempted to dive into home improvement projects, especially when it comes to flooring, but I’ve learned the hard way that some things are best left to the pros. I recently took a shot at refreshing my kitchen tiles, thinking a quick scrub and a good sealer would do the trick. While it looked decent at first, it quickly became apparent that there were deeper issues—I never even considered lippage or etching until it was too late!
It’s interesting how the allure of DIY projects can sometimes lead us down a path that’s tougher than it seems! I appreciate how you highlighted the limitations of DIY travertine restoration. A few years ago, I attempted to restore a worn-down marble countertop myself, thinking I could just buff it out and apply a new seal. It looked decent for a couple of weeks, but eventually, the deep scratches started to re-emerge, making me realize that some jobs really do require professional skills and tools.
It’s great to hear about your experience with marble restoration. You’re not alone in thinking a quick DIY fix might be enough to bring a surface back to life, but it can be tougher than expected. While a simple buff and seal might work for minor issues, deeper scratches or wear often require a more thorough approach that professionals are equipped to handle.