Last Updated on October 11, 2026 by David
A terrazzo floor hidden beneath worn wooden boards can possess remarkable potential for restoration. This was evident in a Northampton property where adhesive residue and cracks became visible once the flooring was removed.
The following photographs illustrate the journey of the floor from its initial state through to the repair, resurfacing, polishing, and subsequent aftercare.
Discovering a Terrazzo Floor Underneath Wooden Boards in Northampton
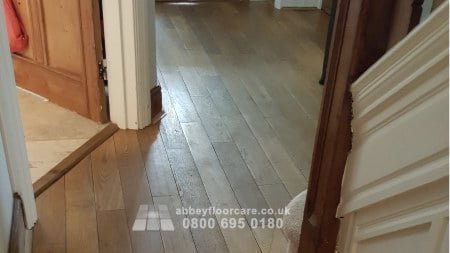
Once the wooden boards were lifted, the terrazzo became visible under the room’s natural light, shifting the focus from replacement to restoration of the original floor. The client initially expected to evaluate the possibility of saving the concealed surface rather than assuming that new flooring was the only viable solution.
Many older houses in Northampton feature a blend of original designs and later modifications. In this case, a timber covering had concealed the terrazzo underneath. With the remaining boards removed, the client could weigh the existing terrazzo against the prospect of installing a new tiled floor, ultimately opting to preserve the character inherent in the property.
Identifying Thick Adhesive on the Newly Exposed Terrazzo Surface
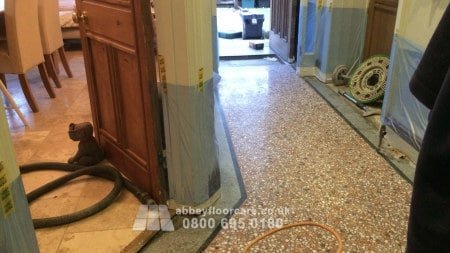
The terrazzo remained structurally intact beneath the old flooring, but a substantial layer of adhesive became evident once the boards were removed, revealing the full area. This residue obscured the original colour, chip details, and finish, making any clean-looking patches misleading in their representation of the floor’s overall condition.
The client opted to remove all the wooden flooring to fully assess the surface before deciding on the next steps.
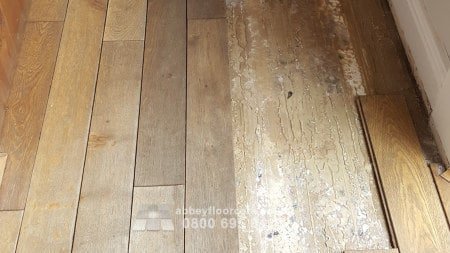
The old adhesive had accumulated significantly, yet it had not bonded so strongly as to impede its controlled removal. I utilised a heavy-duty hand scraper to lift the residue, steering clear of chemicals that could exacerbate contamination or affect the cement matrix. Once the adhesive was cleared, the newly exposed areas provided a more accurate view of the floor’s condition.
What Cracks Were Revealed After Removing the Adhesive?
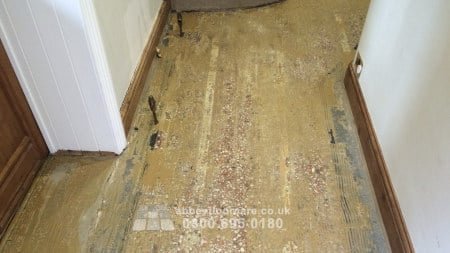
Eliminating the adhesive did not erase all blemishes. Beneath the cleared surface, several larger cracks became apparent alongside finer hairline fractures, which I chose to leave untouched. The broader cracks disrupted the visible surface plane, while the fine lines had minimal impact on the overall appearance in this specific project.
A larger terrazzo crack signifies a physical break in the cement matrix, allowing dirt or adhesive to settle within the gap. This results in a dark or open line that remains visible even after surface contamination has been removed. In contrast, fine hairline cracks often remain visually insignificant and stable enough to forgo filling.
I prepared the larger cracks using diamond-cutting tools to eliminate contamination and weak edges that could hinder the repair. The fine hairline cracks were left in their original state, as filling each narrow line would not yield a substantial visual enhancement. The focus of the intervention was thus on rectifying the defects that disrupted the floor’s continuity.
How Were the Larger Cracks Repaired with Colour-Matched Epoxy?
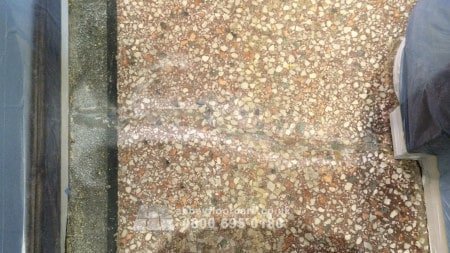
Colour-matched epoxy repairs represented a significant milestone in the Northampton restoration project. After preparing and filling the cracks, they could undergo grinding, honing, and surface renewal as part of a cohesive process. The repair material secured the wider openings while preserving the surrounding aggregate pattern as closely as possible with the available materials.
I adhered to a specific sequence because each stage set up the subsequent one, preventing repaired areas from protruding above the surrounding terrazzo. The cement matrix and marble-chip aggregate react differently to abrasion, making a controlled diamond progression crucial rather than merely applying increased pressure or relying on coarse grits throughout.
- I filled the prepared openings with colour-matched epoxy, acknowledging that older aggregate seldom allows for an invisible repair.
- I ground the cured repairs flush, ensuring the filler was level with the surrounding surface without any raised edges.
- I renewed the worn upper layer using planetary equipment, then progressively refined the continuous surface.
- I completed the honing phase to ensure that the repaired areas and original terrazzo presented a consistent finish.
A planetary grinding machine distributes pressure through its multi-head movement, offering broader coverage and more consistent correction than isolated hand abrasion. First, metal-bond diamond abrasives removed the contaminated and worn layer. Next, resin-bond diamond abrasives refined the grinding marks through intermediate stages, including 50-grit, 100-grit, and 400-grit passes, before the final 800-grit refinement.
The grinding process also revealed the aged binder’s natural pinholes and micro-voids; it did not create every small opening visible at this stage. I meticulously controlled the rinse slurry and extracted it between passes to prevent residue from being redeposited into the pores, continuing the honing process until the surface provided a uniform base for polishing. This planetary grinding precision ensured the repaired floor remained level without unnecessary removal of sound material.
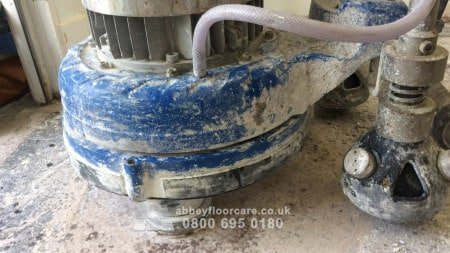
Progressive honing eliminated the remaining scratch pattern, bringing the repaired sections more closely in line with the surrounding surface. A related Northampton terrazzo polishing project illustrates the critical importance of controlled refinement, although this account remains focused on the specific floor revealed beneath the wooden boards.
How Was the Colour Variation of the Marble Chips Enhanced?
After the polishing stage, the marble chips began to reflect light more vibrantly across the terrazzo, while the applied finish helped to retain the floor’s renewed colour variation. Prior to this stage, adhesive staining and worn binder had dulled the aggregate. Following polishing, the decorative chips exhibited greater gloss and clearer visual separation without compromising the floor’s original character.
I employed a marble polishing powder to achieve further optical enhancement after honing; this was not due to the need for more aggressive abrasion. The powder compound required meticulous application: mild acid can react immediately with acid-sensitive chips and cement binder. Controlled polishing was essential to protect the surface from chemical damage and roughening.
Once the surface was dry and the slurry cleared, I applied three coats of a colour-enhancing sealer. This penetrating treatment deepened the binder’s pale tone and increased visual richness while also reducing absorption. It did not create a scratch-proof or acid-proof film, but it provided breathable protection, allowing the restored floor to better respond to spills.
What Was the Outcome of the Terrazzo Floor Restoration?
The transformation was most striking when comparing the restored floor with its previous state. What had once been an adhesive-covered, cracked surface evolved into a cleaner, more uniform terrazzo finish, with its marble-chip character clearly visible. The adhesive no longer dominated the space, and the larger cracks no longer disrupted the restored surface plane.
Before: the newly uncovered floor was burdened with thick adhesive, worn areas, and several larger cracks, while fine hairline lines marked its history. Initially, replacement seemed like a viable option, but a comprehensive assessment revealed that the original aggregate and cement matrix still provided a solid foundation for renewal.
During: larger cracks were repaired, the worn surface was revitalised, and the finish was polished and sealed.
After: the floor achieved a cleaner, more consistent reflective plane, showcasing natural variation rather than a flat, manufactured appearance. The floor looked significantly improved post-intervention and was easier to clean and maintain, with adhesive and loose surface contamination no longer disrupting the finish.
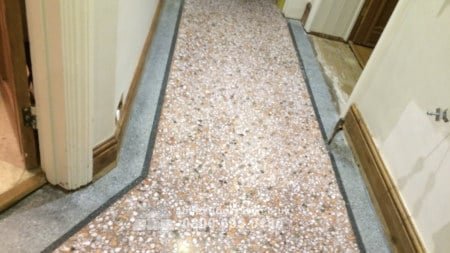
The work did not erase every fine line, and a close inspection could still reveal the floor’s history. the visible repairs seamlessly integrated into a coherent surface. The floor retained the depth and pattern that led the client to choose restoration, while the renewed finish dramatically enhanced the room’s aesthetic. Broader guidance on terrazzo composition, restoration, and care can be found in the terrazzo flooring resource.
What Care Instructions Accompanied the Handover of the Restored Surface?
For this restored terrazzo floor, I outlined that using pH-neutral cleaning products, removing grit before wet mopping, and resealing at appropriate intervals would help prolong its lifespan. I also cautioned the client against using acidic products, as these can etch the marble chips and cement matrix. The restored floor proved to be considerably easier to clean and maintain compared to the worn, adhesive-covered surface, as detailed in the terrazzo maintenance guidance.
Pro Tip: Recommended Products for Daily Terrazzo Maintenance Cleaning.
|
Fila Pro Floor Cleaner
|
LTP MPG Sealer H20
|
Vileda H2PrO Spin Mop System
|

David Allen — Abbey Floor Care
David Allen has over 30 years of expertise in restoring terrazzo and other hard floors through Abbey Floor Care. This Northampton case study details how he rectified adhesive contamination and larger cracks beneath wooden boards before renewing the floor’s surface and finish.
The article Terrazzo Floor Restoration Beneath Boards In Northampton was first found on https://abbeyfloorcare.co.uk