
Last Updated on July 10, 2026 by David
While scratches, dull patches, and failed filler can often be improved without resorting to a complete professional refinish, navigating the safe DIY boundaries can be challenging. Homeowners can enhance a lightly soiled travertine floor through careful cleaning, minor cosmetic repairs, thorough slurry extraction, proper drying techniques, and appropriate sealing. issues like etching, uneven tiles, deep cracks, heavy coatings, and intricate resin-quality repairs require specialised evaluation.
The following method maintains control at each stage, ensuring that cleaning does not result in additional residue, excess moisture, or surface damage.
Essential Tools for When Mopping Fails to Restore Shine
If your travertine floor appears grey or patchy even after mopping, run your clean fingertips across several tiles and grout lines. A slightly draggy sensation, dark pits, or an uneven sheen typically indicates that routine cleaning is ineffective in removing embedded dirt. At this point, refrain from using stronger household products until a thorough assessment has been conducted.
Common observations include dark soil resurfacing as soon as the surface dries, cloudy areas appearing under angled light, noticeably darker grout lines, and shallow holes retaining dirty moisture. Sticky patches may also suggest old cleaner or sealer residue rather than new dirt.
- A vacuum cleaner or Hoover equipped with a soft floor head for removing loose dirt and grit
- An acid-free stone cleaner, a clean bucket, warm water, and a soft microfibre mop
- A soft nylon brush for gentle agitation around pits and grout recesses
- A wet vacuum or slurry extractor with a clean recovery tank and unobstructed suction path
- Colour-compatible cement grout, a small putty knife, and soft cloths for minor cosmetic filling
- Dry towels, adequate ventilation, a damp meter if available, and a suitable penetrating or surface sealer
Inspect the recovery tank and suction hose before applying any liquids. Restricted suction may leave dirty solution behind, which could make the tiles appear unchanged once dry and may spread grime into adjacent pits.
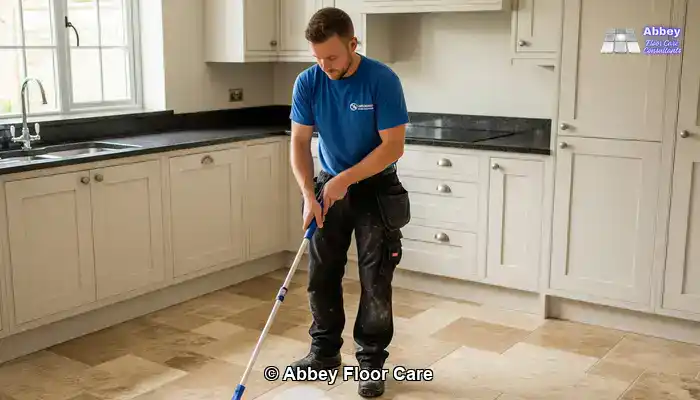
Homeowners primarily facing dark pits can refer to guidance on cleaning soil trapped in travertine holes. A thorough assessment of the floor is essential before opting for a stronger product, as dullness may also stem from an old coating or a damaged finish.
What Dangers Can Arise During DIY Travertine Restoration?
Should an acidic substance leave a dull mark that feels different beneath your fingertip after wiping, the travertine surface has undergone chemical alteration. Travertine’s calcium carbonate structure reacts adversely to vinegar, fruit juice, wine, and acidic bathroom cleaners, leading to dissolution that results in cloudy spots or pale, rough patches that further cleaning cannot rectify.
The natural holes formed through geological processes are part of the stone’s character, not indicators of instability. These cavities can trap loosened soil mechanically, so repeatedly saturating an open or cracked area can carry dirty solution into nearby voids, leaving a larger dark patch once the floor dries.
Travertine may appear cleaner while becoming more difficult to restore safely if acids, abrasive tools, or excess moisture alter the surface.
Using aggressive pads and uncontrolled sanding can damage the delicate calcite layer above deeper cavities. Once this protective surface diminishes, more holes may emerge, and the finish may become uneven. Lippage refers to the height difference between adjacent tile edges caused by installation variations or movement within the floor. Homeowners can notice raised edges that catch shoes, feel uneven underfoot, or cast narrow shadows under angled light. Professional correction involves mechanically reducing the higher edges through controlled diamond honing before refining the surrounding finish; addressing etched areas also falls under a diagnostic-led professional process, rather than a homeowner’s experiment.
Film-forming coatings can create complications if applied over residue or a floor that is not entirely dry. A topical surface film may become dull, yellowed, sticky, or challenging to maintain, while steam heat can soften the coating and lead to bond separation. Guidance on removing old travertine sealers safely outlines why identifying heavy coating build-up is crucial before proceeding with any further treatment.
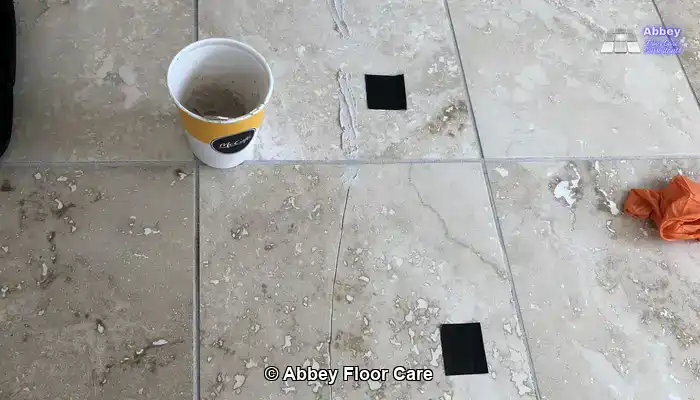
DIY work should cease where staining remains deeply embedded, dull areas are etched, tiles exhibit varying heights, cracks extend across multiple units, or repairs necessitate specialist resin and seamless colour matching. Minor grout-based cosmetic fills differ significantly from structural crack repairs, which are detailed in the dedicated travertine hole and crack repair method.
A Detailed Step-by-Step Guide to Restoring Your Travertine Floor
If the floor feels draggy under a clean hand or displays dark pits, fuzzy reflections, or obvious surface films under angled light, mark those areas before applying any cleaner. Each visible or tactile condition can then be re-evaluated after cleaning and drying.
The cleaning process hinges on compatible chemistry, gentle mechanical agitation, and immediate liquid recovery. A professional-grade alkaline stone cleaner may effectively remove stubborn organic grime through controlled application, but it must be diluted and used strictly according to the manufacturer’s guidelines, followed by thorough rinsing and contamination extraction.
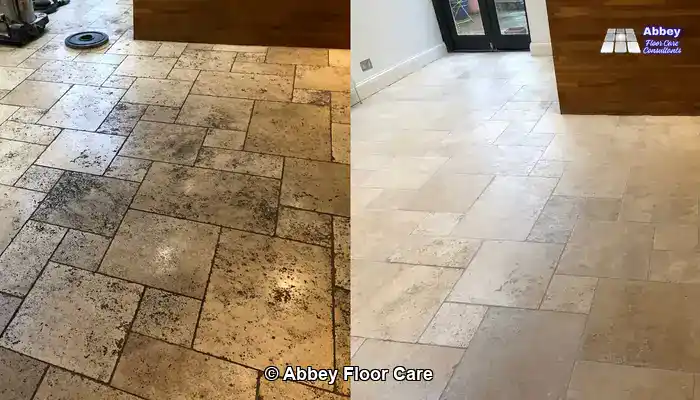
The finished floor should regain a clearer colour and become significantly easier to maintain than a surface burdened with old slurry or cleaner residue. Professional extraction typically yields a far superior result compared to mopping alone, as the dirty solution is removed rather than merely redistributed across grout edges and shallow holes.
1. Evaluate the Current Finish
If the floor appears dull in certain areas but shiny in others, first determine whether the variation is due to dirt, wear, or an old coating. A shine that scratches with a fingernail or feels tacky may suggest a surface sealer, whereas a clean honed finish typically feels smooth and dry.
Position a bright overhead light or torch at a low angle and examine the reflection. A clear reflection indicates an intact finish. Micro-scratching manifests as a network of fine, shallow abrasions on the stone surface, caused by grit, abrasive pads, or uncontrolled mechanical contact. Homeowners may notice blurry or fuzzy reflections, fine lines under angled light, or traffic areas appearing dull despite being clean. Professional correction employs controlled diamond honing to uniformly remove the damaged surface layer before refining the finish; residue or etch marks require separate diagnosis. Proceed once the surface condition is understood; halt if loose tiles, long cracks, or significant height variations are present.
2. Conduct a Cleaner and Sealer Test
If an inconspicuous test patch alters colour, sheen, or texture, do not proceed with treatment across the main floor. Test every cleaner, stripping agent, and sealer in a hidden area, allowing the patch to dry completely before evaluating the result.
An acid-free, pH-balanced stone cleaner is the safest initial choice for light contamination. More substantial grime may warrant the use of alkaline chemistry as directed by the label, but only if clean-water rinsing and wet extraction are feasible. Avoid substituting vinegar, descaler, or acidic grout cleaner, even in the presence of UK hard-water deposits.
3. Eliminate Loose Dirt Prior to Wet Cleaning
If grit can be felt beneath a hand or heard under the vacuum head, remove it before introducing moisture. Loose particles can act abrasively beneath a mop, brush, or rotary action, leading to fresh scratches during cleaning.
Vacuum the entire area with a soft floor head, then use a soft brush around skirting boards, pits, and grout recesses. Continue once no loose particles remain. Stop if the vacuum head leaves marks on the surface or begins to pull loose filler from holes.
4. Apply the Cleaning Solution in Manageable Sections
If the cleaner starts to dry before agitation is complete, the working area is too large. Divide the room into sections that can remain wet throughout the application, brushing, and extraction processes.
Prepare the chosen product precisely as directed and apply it evenly with a mop or controlled spray. Allow only the specified dwell time, keeping the area wet without flooding joints or cracks. A kitchen in Surrey with underfloor heating may dry more quickly than a cooler hallway, so ambient temperature and airflow should guide the section size.
Continue when the grime begins to loosen without altering the texture of the stone. Stop if the test area turns rough, pale, or unexpectedly glossy, or if an old film softens into sticky streaks.
5. Agitate Without Damaging the Surface
If dark soil remains around grout lines and shallow pits, focus on those areas using a soft-bristle nylon brush rather than an abrasive pad. The brush should agitate the grime gently without cutting into the thin surface layer or dragging filler from the cavities.
Utilise overlapping strokes and moderate pressure, paying particular attention to high-traffic areas, such as kitchens and garden doors. A low-speed rotary machine can provide controlled agitation, but hiring unfamiliar equipment introduces risks and should never evolve into an improvised honing process.
A honed and filled travertine floor boasts a smooth, consistent satin surface. Unfilled or tumbled travertine retains its visible voids. These may be filled or left open, but even when enhanced, the voids appear visually matt compared to the surrounding surface.
6. Immediately Extract the Dirty Slurry
If grey liquid lingers in pits or grout recesses after brushing, do not allow it to dry back onto the floor. Recover the slurry while it remains mobile, using a wet vacuum equipped with steady suction and a clean recovery tank.
Pass the extractor over each section from multiple directions. A single suction path may leave slurry along grout edges and inside shallow cavities, while cross-directional recovery enhances removal and helps prevent redeposition.
Continue until the extracted liquid appears visibly cleaner and the surface no longer releases grey residue when wiped with a white cloth. Escalate efforts when deeply embedded contamination persists despite repeated controlled extraction, as illustrated by this professional explanation of persistent travertine dullness and dark pits. Specialist hot-water extraction addresses contamination that domestic equipment may leave behind.
7. Execute Only Small Cosmetic Grout Repairs
If isolated holes remain clean, firm, and shallow after drying, they may be suitable for minor cement-grout repairs. Loose filler, moving cracks, or cavities extending beneath a broken edge necessitate specialist evaluation instead.
Gently remove loose debris, then press a compatible grout-based compound into the clean repair area using a small putty knife. Ensure the material remains inside the cavity, smooth it level with the surrounding plane, and wipe the tile face before the residue hardens.
Continue when the fill is sound, neatly contained, and stable after curing. Cease work if the cavity requires diamond burr preparation, structural bonding, or a colour-matched resin application; these procedures rely on specialist tools and controlled adhesion rather than household fillers.
8. Rinse Thoroughly Until No Cleaner Remains
If a clean white cloth continues to pick up foam or slippery residue, the floor has not been rinsed adequately. Residual alkalinity induces chemical build-up, weakens protective treatments, and can lead to rapid dullness re-emergence.
Apply clean water conservatively, agitate lightly, and extract immediately. Repeat the rinsing process from various directions until the recovery water appears clear and the surface no longer feels soapy. Domestic steam mops are unsuitable because they generate heat and redistribute moisture without eliminating contamination.
Continue when the floor feels clean rather than slippery. Halt if repeated rinsing continues to release degraded coating, as this may indicate that controlled stripping is necessary rather than further washing.
9. Allow the Floor to Dry Completely
If tiles or repaired areas remain darker than their surroundings, retained moisture may still be present. Do not evaluate the colour or apply sealer while this temporary darkening persists.
Ventilate the area and allow the stone, grout, and cosmetic fills to dry under stable conditions. Drying may take overnight or longer, depending on the thickness of the floor, room temperature, and the quantity of water used. A damp meter offers a more reliable check than appearance alone.
Continue when the floor is uniformly dry and the readings stabilise. Cease if damp areas consistently reappear, especially in an older property where underlying building fabric or substrate issues may be affecting the installation.
10. Apply the Appropriate Sealer
If clean water darkens the tile rapidly during a small drop test, the floor may require renewed protection. Water that beads for several minutes suggests some sealer remains, although patchy behaviour may indicate uneven wear.
A penetrating impregnating sealer functions beneath the surface by minimising liquid entry into microscopic pores without leaving a visible coating. Apply thin, even coats according to the manufacturer’s instructions, remove all excess before it cures, and avoid leaving a shiny residue on the stone surface.
A film-forming topical coating may be chosen to unify the appearance of filled stone and grout, yet it entails a higher maintenance requirement and must never be applied over dampness or residue. Homeowners assessing protection types can refer to the guidance on choosing a travertine sealer for long-term protection. Continue when the selected treatment aligns with the finish and the test patch; stop if the previous coating cannot be identified.
11. Review the Final Result After Curing
If the floor feels tacky or displays smeared shine under raking light, excess sealer may still be present on the surface. Do not apply another coat until that residue has been removed using the manufacturer’s approved method.
Examine colour consistency, grout clarity, repaired holes, and water behaviour after the full curing period. A properly executed DIY result should reveal an evenly clean surface, stable cosmetic fills, and a natural finish devoid of sticky patches or obvious coating lines.
Proper ongoing care is the single most crucial factor in prolonging the outcome: remove grit prior to wet mopping, utilise residue-free pH-neutral cleaning solutions, and reseal at the appropriate intervals. Avoid steam cleaning, as heat and uncontrolled moisture can weaken surface coatings; further distinctions are covered in the guide to steam cleaning travertine floors safely.
Identifying a Successful DIY Restoration Outcome
If the completed floor feels dry rather than tacky beneath a clean shoe and reveals no smeared film under raking light, the cleaning and sealing stages have likely been managed effectively. The tiles should exhibit a more even colour, dark pits should be diminished, and grout lines should appear clearer without looking artificially coated.
A successful DIY outcome features clean cavities, stable small grout fills, and a protective treatment that does not visibly rest on the surface. A penetrating sealer should maintain the natural appearance while enhancing resistance to liquid penetration. Repaired areas may remain slightly darker until retained moisture has exited the surrounding stone, so assess the colour only after full drying rather than immediately after completion.
A condition necessitating professional restoration remains dull under angled light, catches a fingernail, feels uneven underfoot, or displays spreading cracks and failed filler. Etching cannot be removed since the calcite surface has already been dissolved. Lippage, the height difference between adjacent tile edges caused by installation variations or movement within the floor, can lead to raised edges that catch footwear, feel uneven underfoot, or cast narrow shadows under angled light. Professional correction mechanically reduces these higher edges using controlled diamond honing before refining the surrounding finish.
Specialist resin filling differs significantly from minor cement-grout repairs. A professional repair employs bonding resin, cavity preparation, and meticulous colour matching to stabilise missing filler or blend damaged edges into the surrounding plane. A restored and correctly sealed floor can appear dramatically improved compared to its pre-intervention state and requires less effort to maintain, but seamless structural repairs depend on professional tools and expertise.
Recognising When Travertine Issues Exceed DIY Capabilities
Problems that continue to catch a fingernail, feel uneven underfoot, or remain dull under angled light require guidance beyond standard homeowner methods. Deeply ingrained soil, etched patches, spreading cracks, heavy topical coatings, and repairs necessitating resin-quality colour matching cannot be safely rectified through repeated cleaning or household polishing products. Lippage, indicating height differences between adjoining tile edges due to installation variations or movement within the floor, leads to raised edges that catch footwear, feel uneven underfoot, or cast narrow shadows under angled light. Professional correction utilises controlled diamond honing to reduce these higher edges before refining the surrounding surface.
The homeowner method encompasses assessment, controlled stone-safe cleaning, slurry extraction, limited grout filling, complete drying, and suitable sealer application. Broader decisions regarding cleaning, repair, sealing, and professional refinement are outlined in the travertine flooring care and restoration hub. This guidance assists in distinguishing surface contamination from physical damage before undertaking any further work.
Document the locations of dark areas, cracks, or dull patches that reappear after the floor has dried. Photographs captured under the same angled light can reveal whether the issue is isolated or progressing, providing specialists with better evidence for a site visit. Any recommendations should focus on the identified defects and the immediate next step rather than expanding into a separate maintenance or aftercare plan.

David Allen — Abbey Floor Care
David Allen boasts over 30 years of experience with Abbey Floor Care, specialising in assessing and restoring travertine floors across the UK. His expertise encompasses the controlled processes outlined here: stone-safe cleaning, slurry extraction, limited cosmetic filling, complete drying, and sealer application, all while establishing clear boundaries for defects that require professional intervention.
The Article Restore Travertine Floors? When Mopping Stops Working first found on https://www.abbeyfloorcare.co.uk


David, your insights into caring for travertine floors are incredibly timely, especially for those of us maintaining natural stone in our homes. It’s fascinating to think about the variety of challenges homeowners face, particularly the differences between cosmetic upkeep and situations that necessitate professional intervention. The description of the necessary touch and control during cleaning processes really resonates. I remember struggling with similar issues when I first moved into a home with travertine tiles.