
Last Updated on June 30, 2026 by David
Transforming a Home Environment: The Travertine Restoration Journey in Richmond
A natural stone floor in a busy kitchen and dining area contributes significantly to the character of a home, serving as the foundation for the entire space. persistent foot traffic, frequent spills, and the movement of furniture can gradually diminish its appeal. This was precisely the situation with a 37-square-metre honed and filled travertine floor in Richmond, South West London, where routine cleaning had become insufficient.
Despite diligent cleaning efforts by the homeowner, the floor appeared lacklustre, uneven, and dark. The issues were deeper than mere surface dirt; the protective finish had worn away, dirt had penetrated the stone, and the original resin fills were deteriorating. At this stage, effective restoration required moving beyond basic cleaning to involve thorough diamond refinement and structural repairs, granting the floor the rejuvenation it desperately needed.
Understanding the Damage: What Caused the Floor to Deteriorate?
Travertine is an exquisite stone, full of unique pores and mineral patterns, but it requires a delicate balance of smooth honing and robust filler to maintain its aesthetic appeal. In this Richmond home, that balance had been disrupted, leading to four interconnected issues that were evident throughout the space:
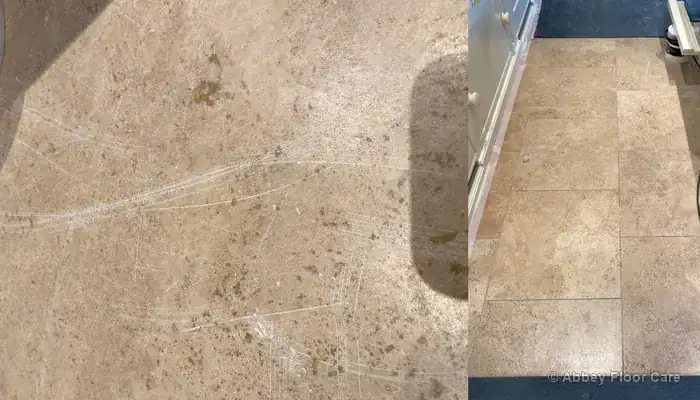
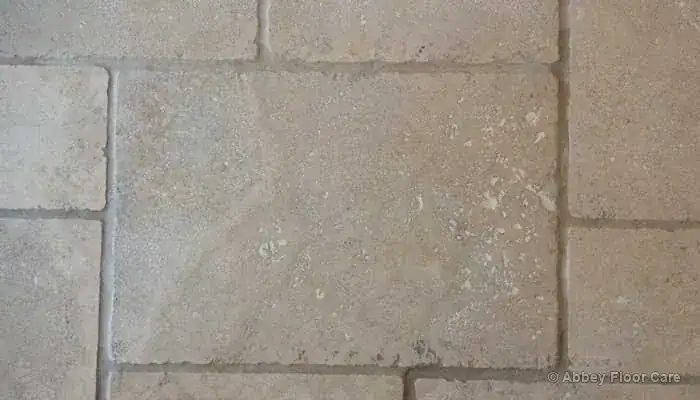
- Loss of Surface Finish: Daily grit from the pathway between the kitchen and dining area gradually scratched the stone. The original mid-sheen factory finish had faded to dull, grey lanes that no longer reflected light effectively.
- Grout Discolouration: With the finish deteriorated, normal cleaning methods acted like a squeegee, pushing dirty water directly into the grout lines. Light beige joints had darkened into pronounced lines, disrupting the visual flow of the room.
- Mechanical Scratches: The movement of chairs and tables left faint arcs and drag marks across the floor. In low light, these scratches compromised the smooth appearance of the stone, rendering the surface dull.
- Pitting and Exposure of Voids: Travertine’s natural holes, typically filled at the factory, had been compromised by years of foot traffic and harsh cleaning agents. As the filler deteriorated, small pits emerged, trapping dirt and making the floor appear more worn than it actually was.
Effective Restoration Techniques: Comprehensive Cleaning, Precise Honing, and Multi-Stage Filling
To restore the floor to its original splendour while preserving its natural character, we implemented a detailed, multi-step restoration strategy. Travertine of this age demands a careful approach that balances thorough cleaning with gentle mechanical refinement, ensuring each phase effectively eliminates damage while respecting the inherent qualities of the stone.
Step 1: Removing Deep-seated Dirt
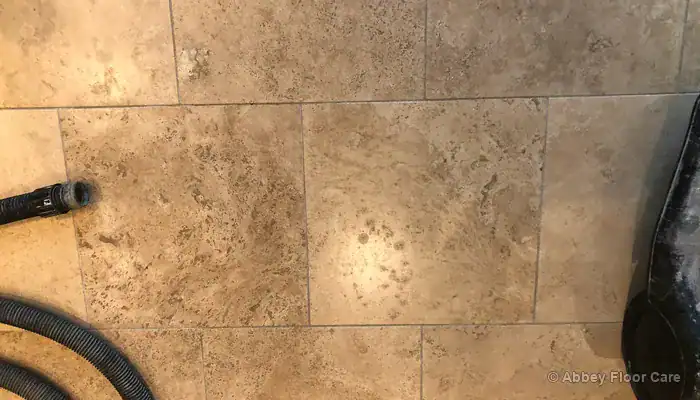
We commenced with a comprehensive dry vacuum to eliminate loose grit. Subsequently, we applied a professional high-alkaline cleaner to dissolve cooking residues, old mop remnants, and ingrained grime embedded within the stone. Using a heavy-duty rotary machine equipped with agitation brushes, we worked the solution deep into the pores and grout lines. As the dirt lifted into a slurry, we promptly rinsed it away using high-vacuum hot water extraction, ensuring no residue remained on the floor.
Step 2: Controlled Diamond Honing for Scratch Removal
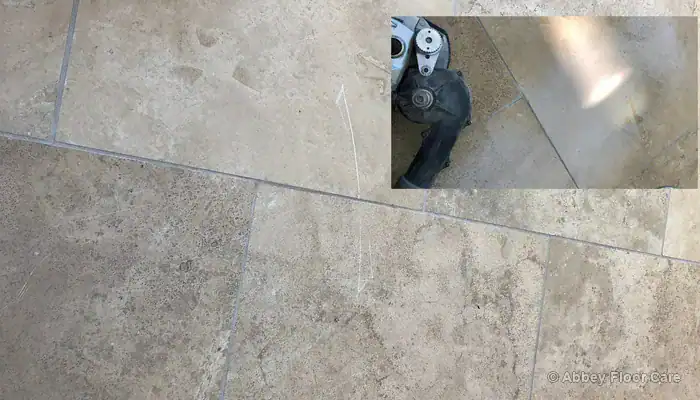
Once the surface was adequately cleaned, we addressed the scratch patterns across the tiles. While standard rotary honing with 100-400 grit diamonds is effective, it can be overly aggressive, stripping away the top layer of the stone and exposing the natural voids in filled travertine.
To mitigate this risk, we utilised a hand-held honing machine applying light, controlled pressure. This technique enabled us to remove the scratches without compromising too much of the surface. After eliminating the marks, we transitioned to the rotary machine with 800-grit diamonds to begin closing the stone's surface, followed by 1500-grit pads to unify the finish and restore a smooth, even satin appearance.
Step 3: Repairing the Travertine and Preparing for Sealing
Honing can sometimes uncover small hidden voids beneath the surface of travertine, so we meticulously inspected each tile. Any open pits or missing factory fills were cleaned, stabilised, and restored using colour-matched filler designed to blend seamlessly with the beige stone. This process ensured the floor was fully repaired, level, and ready for a durable protective seal.
Once the repairs had sufficiently cured, we gently honed them to ensure they were perfectly level with the adjacent tiles. Following this, we allowed the floor to dry completely, utilising a digital damp meter to confirm that no moisture lingered beneath the surface before applying the protective sealer.
Visual Transformation: Achieving a Smooth Satin Finish
The restoration of the Richmond kitchen and dining area underscores the remarkable difference between merely cleaning a floor and genuinely revitalising the stone material.
| Floor Feature | Before Professional Intervention | After Professional Restoration |
|---|---|---|
| Traffic Lanes | Dull, flat, grey pathways traversing the kitchen | Clear, uniform tiles with a soft satin sheen that beautifully reflects light |
| Grout Lines | Dark grout lines that disrupted the visual harmony of the room | Clean, light beige joints that blend seamlessly with the travertine |
| Tile Surface | Faint scratches, drag marks, and scuffs from daily use | Smooth, scratch-free tiles refined to a pristine 1500-grit clarity |
| Natural Pits | Open voids accumulating dirt and casting shadows | Completely repaired with colour-matched filler, level, and seamlessly integrated with the surrounding stone |
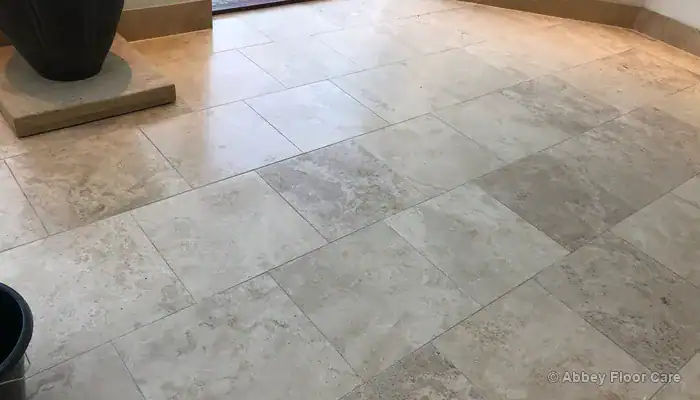
With the structural issues addressed, the floor now looks as it was intended. The surface has been honed to a smooth finish and properly sealed, allowing it to resist spills and daily dirt rather than absorb them. This transformation simplifies everyday cleaning, making it a pleasure to maintain.
Maintaining Your Restored Travertine Floor: Essential Care Tips
To ensure your newly restored floor remains in excellent condition for years to come, a straightforward and consistent care routine is crucial. A brief daily sweep or vacuum to remove dry grit before mopping will help protect the surface from unnecessary wear. When mopping, use a gentle, pH-neutral stone cleaner, as standard supermarket detergents can be too harsh and may dull the stone and compromise the protective seal over time.
Avoid using steam mops, as the intense, pressurised heat can degrade specialist stone sealers and soften resin fills, allowing dirt to penetrate deeper into the stone. A little thoughtful care will keep your floor feeling clean, smooth, and easy to maintain.
For a more comprehensive understanding of managing natural stone surfaces, explore our extensive guides:
- Review the complete blueprint for stone preservation in our comprehensive travertine restoration guide.
- Learn to tackle localized damage with our technical breakdown of travertine tile repair and hole filling.
- Discover the chemical reasons behind grout discolouration in our feature explaining why travertine grout turns black.
- Understand how regional water types and domestic settings influence stone longevity in modern travertine floor care for Surrey homes.

David Allen — Abbey Floor Care
David Allen has over 30 years of experience restoring travertine and other natural stone floors throughout the UK with Abbey Floor Care. This case study from Richmond, South West London, illustrates how dull tiles, scratched areas, soiled grout, and missing filler were expertly rectified in a kitchen and dining room.
The Article How We Revitalised a Worn Travertine Kitchen Floor in Richmond first appeared on https://www.abbeyfloorcare.co.uk